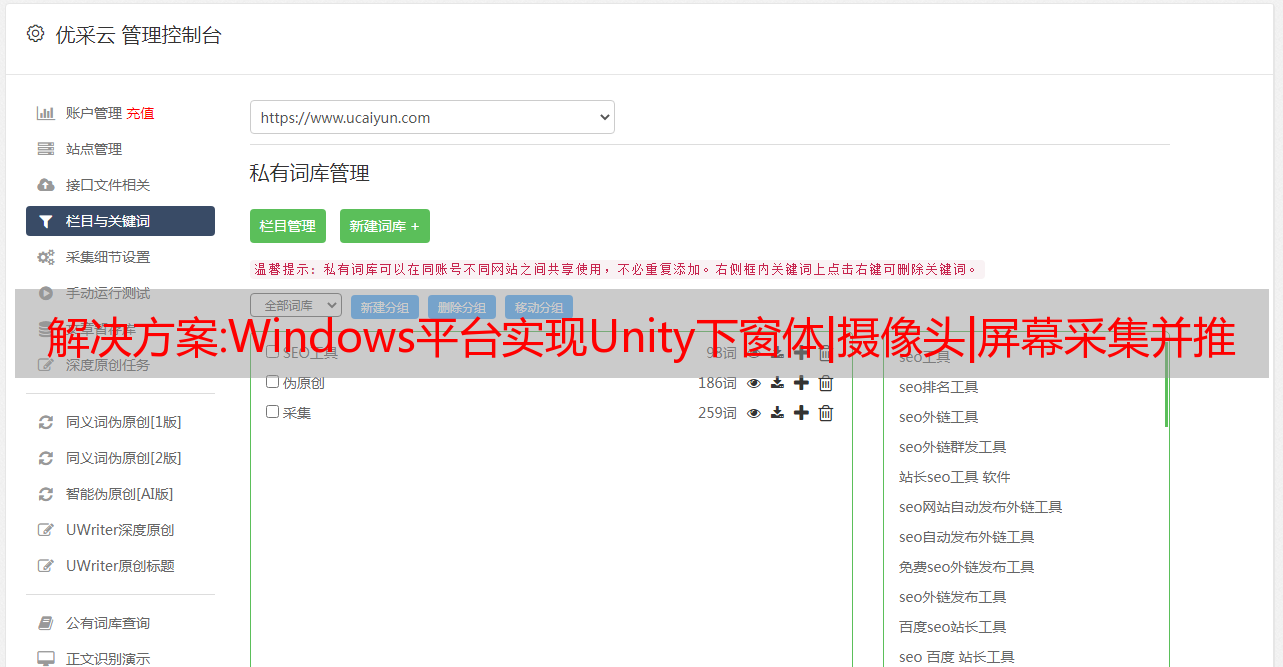
解决方案:Windows平台实现Unity下窗体|*敏*感*词*|屏幕采集并推送至RTMP服务器
优采云 发布时间: 2022-11-19 07:31解决方案:Windows平台实现Unity下窗体|*敏*感*词*|屏幕采集并推送至RTMP服务器
技术背景
随着Unity3D的应用范围越来越广,越来越多的行业开始基于Unity3D开发产品,如传统行业的虚拟仿真教育、航空工业、室内设计、城市规划、工业仿真等领域。
基于此,许多开发者苦于 Unity 环境中缺乏低延迟的推拉流解决方案。几年前,我们在Unity环境下推出了一款跨平台的低延迟RTMP|RTSP直播播放器,解决了很多问题。延迟关键的使用场景。
随着时间的推移,越来越多的开发者联系我们,希望我们能够在Unity环境下推出RTMP推送模块,从Unity中获取实时数据,实现延迟更低、效率更高的数据传输和推送。基于此,我们发布了Unity环境下的RTMP推送模块。
本文以Windows平台为例。数据来源为Unity窗口、*敏*感*词*或整屏、编码传输模块、或调用大牛直播SDK(官方)的原生接口。简单的界面是一个预览:
技术实现 1. 基本初始化
private bool InitSDK()
{
if (!is_pusher_sdk_init_)
{
// 设置日志路径(请确保目录存在)
String log_path = "D:\pulisherlog";
NTSmartLog.NT_SL_SetPath(log_path);
UInt32 isInited = NTSmartPublisherSDK.NT_PB_Init(0, IntPtr.Zero);
if (isInited != 0)
{
Debug.Log("调用NT_PB_Init失败..");
return false;
}
is_pusher_sdk_init_ = true;
}
return true;
}
2.调用Open()接口获取推送实例
public bool OpenPublisherHandle(uint video_option, uint audio_option)
{
if (publisher_handle_ != IntPtr.Zero)
{
return true;
}
publisher_handle_count_ = 0;
if (NTBaseCodeDefine.NT_ERC_OK != NTSmartPublisherSDK.NT_PB_Open(out publisher_handle_,
video_option, audio_option, 0, IntPtr.Zero))
{
return false;
}
if (publisher_handle_ != IntPtr.Zero)
{
pb_event_call_back_ = new NT_PB_SDKEventCallBack(PbEventCallBack);
NTSmartPublisherSDK.NT_PB_SetEventCallBack(publisher_handle_, IntPtr.Zero, pb_event_call_back_);
return true;
}
else
{
return false;
}
}
3.初始化参数配置
这里需要注意的是,如果要采集unity窗口,需要设置图层模式,先填充一层RGBA黑色背景,再添加一层用于叠加外部数据。
private void SetCommonOptionToPublisherSDK()
{
if (!IsPublisherHandleAvailable())
{
Debug.Log("SetCommonOptionToPublisherSDK, publisher handle with null..");
return;
}
NTSmartPublisherSDK.NT_PB_ClearLayersConfig(publisher_handle_, 0,
0, IntPtr.Zero);
if (video_option == NTSmartPublisherDefine.NT_PB_E_VIDEO_OPTION.NT_PB_E_VIDEO_OPTION_LAYER)
{
// 第0层填充RGBA矩形, 目的是保证帧率, 颜色就填充全黑
int red = 0;
int green = 0;
int blue = 0;
int alpha = 255;
NT_PB_RGBARectangleLayerConfig rgba_layer_c0 = new NT_PB_RGBARectangleLayerConfig();
rgba_layer_c0.base_.type_ = (Int32)NTSmartPublisherDefine.NT_PB_E_LAYER_TYPE.NT_PB_E_LAYER_TYPE_RGBA_RECTANGLE;
rgba_layer_c0.base_.index_ = 0;
rgba_layer_c0.base_.enable_ = 1;
rgba_layer_c0.base_.region_.x_ = 0;
rgba_layer_c0.base_.region_.y_ = 0;
rgba_layer_c0.base_.region_.width_ = video_width_;
rgba_layer_c0.base_.region_.height_ = video_height_;
rgba_layer_c0.base_.offset_ = Marshal.OffsetOf(rgba_layer_c0.GetType(), "base_").ToInt32();
rgba_layer_c0.base_.cb_size_ = (uint)Marshal.SizeOf(rgba_layer_c0);
rgba_layer_c0.red_ = System.BitConverter.GetBytes(red)[0];
rgba_layer_c0.green_ = System.BitConverter.GetBytes(green)[0];
rgba_layer_c0.blue_ = System.BitConverter.GetBytes(blue)[0];
rgba_layer_c0.alpha_ = System.BitConverter.GetBytes(alpha)[0];
IntPtr rgba_conf = Marshal.AllocHGlobal(Marshal.SizeOf(rgba_layer_c0));
Marshal.StructureToPtr(rgba_layer_c0, rgba_conf, true);
UInt32 rgba_r = NTSmartPublisherSDK.NT_PB_AddLayerConfig(publisher_handle_, 0,
rgba_conf, (int)NTSmartPublisherDefine.NT_PB_E_LAYER_TYPE.NT_PB_E_LAYER_TYPE_RGBA_RECTANGLE,
0, IntPtr.Zero);
Marshal.FreeHGlobal(rgba_conf);
NT_PB_ExternalVideoFrameLayerConfig external_layer_c1 = new NT_PB_ExternalVideoFrameLayerConfig();
external_layer_c1.base_.type_ = (Int32)NTSmartPublisherDefine.NT_PB_E_LAYER_TYPE.NT_PB_E_LAYER_TYPE_EXTERNAL_VIDEO_FRAME;
external_layer_c1.base_.index_ = 1;
external_layer_c1.base_.enable_ = 1;
external_layer_c1.base_.region_.x_ = 0;
external_layer_c1.base_.region_.y_ = 0;
external_layer_c1.base_.region_.width_ = video_width_;
external_layer_c1.base_.region_.height_ = video_height_;
external_layer_c1.base_.offset_ = Marshal.OffsetOf(external_layer_c1.GetType(), "base_").ToInt32();
external_layer_c1.base_.cb_size_ = (uint)Marshal.SizeOf(external_layer_c1);
IntPtr external_layer_conf = Marshal.AllocHGlobal(Marshal.SizeOf(external_layer_c1));
Marshal.StructureToPtr(external_layer_c1, external_layer_conf, true);
UInt32 external_r = NTSmartPublisherSDK.NT_PB_AddLayerConfig(publisher_handle_, 0,
external_layer_conf, (int)NTSmartPublisherDefine.NT_PB_E_LAYER_TYPE.NT_PB_E_LAYER_TYPE_EXTERNAL_VIDEO_FRAME,
0, IntPtr.Zero);
Marshal.FreeHGlobal(external_layer_conf);
}
<p>
else if (video_option == NTSmartPublisherDefine.NT_PB_E_VIDEO_OPTION.NT_PB_E_VIDEO_OPTION_CAMERA)
{
CameraInfo camera = cameras_[cur_sel_camera_index_];
NT_PB_VideoCaptureCapability cap = camera.capabilities_[cur_sel_camera_resolutions_index_];
SetVideoCaptureDeviceBaseParameter(camera.id_.ToString(), (UInt32)cap.width_, (UInt32)cap.height_);
}
SetFrameRate((UInt32)CalBitRate(edit_key_frame_, video_width_, video_height_));
Int32 type = 0; //软编码
Int32 encoder_id = 1;
UInt32 codec_id = (UInt32)NTCommonMediaDefine.NT_MEDIA_CODEC_ID.NT_MEDIA_CODEC_ID_H264;
Int32 param1 = 0;
SetVideoEncoder(type, encoder_id, codec_id, param1);
SetVideoQualityV2(CalVideoQuality(video_width_, video_height_, is_h264_encoder));
SetVideoMaxBitRate((CalMaxKBitRate(edit_key_frame_, video_width_, video_height_, false)));
SetVideoKeyFrameInterval((edit_key_frame_));
if (is_h264_encoder)
{
SetVideoEncoderProfile(1);
}
SetVideoEncoderSpeed(CalVideoEncoderSpeed(video_width_, video_height_, is_h264_encoder));
// 音频相关设置
SetAuidoInputDeviceId(0);
SetPublisherAudioCodecType(1);
SetPublisherMute(is_mute);
SetEchoCancellation(0, 0);
SetNoiseSuppression(0);
SetAGC(0);
SetVAD(0);
SetInputAudioVolume(Convert.ToSingle(edit_audio_input_volume_));
}
</p>
4.数据采集
*敏*感*词*和屏幕数据采集依然调用原生SDK接口,本文不再赘述。如果需要采集Unity形式的数据,可以参考如下代码:
if ( texture_ == null || video_width_ != Screen.width || video_height_ != Screen.height)
{
Debug.Log("OnPostRender screen changed++ scr_width: " + Screen.width + " scr_height: " + Screen.height);
if (screen_image_ != IntPtr.Zero)
{
Marshal.FreeHGlobal(screen_image_);
screen_image_ = IntPtr.Zero;
}
if (texture_ != null)
{
UnityEngine.Object.Destroy(texture_);
texture_ = null;
}
video_width_ = Screen.width;
video_height_ = Screen.height;
texture_ = new Texture2D(video_width_, video_height_, TextureFormat.BGRA32, false);
screen_image_ = Marshal.AllocHGlobal(video_width_ * 4 * video_height_);
Debug.Log("OnPostRender screen changed--");
return;
}
texture_.ReadPixels(new Rect(0, 0, video_width_, video_height_), 0, 0, false);
texture_.Apply();
从纹理中,通过调用 GetRawTextureData() 获取原创数据。
5、数据对接
获取原创数据后,通过调用系统封装的OnPostRGBAData()接口将数据传递给SDK层。
6.本地数据预览
public bool StartPreview()
{
if(CheckPublisherHandleAvailable() == false)
return false;
video_preview_image_callback_ = new NT_PB_SDKVideoPreviewImageCallBack(SDKVideoPreviewImageCallBack);
NTSmartPublisherSDK.NT_PB_SetVideoPreviewImageCallBack(publisher_handle_, (int)NTSmartPublisherDefine.NT_PB_E_IMAGE_FORMAT.NT_PB_E_IMAGE_FORMAT_RGB32, IntPtr.Zero, video_preview_image_callback_);
if (NTBaseCodeDefine.NT_ERC_OK != NTSmartPublisherSDK.NT_PB_StartPreview(publisher_handle_, 0, IntPtr.Zero))
{
if (0 == publisher_handle_count_)
{
NTSmartPublisherSDK.NT_PB_Close(publisher_handle_);
publisher_handle_ = IntPtr.Zero;
}
return false;
}
publisher_handle_count_++;
is_previewing_ = true;
return true;
}
public void StopPreview()
{
if (is_previewing_ == false) return;
is_previewing_ = false;
publisher_handle_count_--;
NTSmartPublisherSDK.NT_PB_StopPreview(publisher_handle_);
if (0 == publisher_handle_count_)
{
NTSmartPublisherSDK.NT_PB_Close(publisher_handle_);
publisher_handle_ = IntPtr.Zero;
}
}
设置好预览后,处理预览的数据回调
//预览数据回调
public void SDKVideoPreviewImageCallBack(IntPtr handle, IntPtr user_data, IntPtr image)
{
NT_PB_Image pb_image = (NT_PB_Image)Marshal.PtrToStructure(image, typeof(NT_PB_Image));
NT_VideoFrame pVideoFrame = new NT_VideoFrame();
pVideoFrame.width_ = pb_image.width_;
pVideoFrame.height_ = pb_image.height_;
<p>
pVideoFrame.stride_ = pb_image.stride_[0];
Int32 argb_size = pb_image.stride_[0] * pb_image.height_;
pVideoFrame.plane_data_ = new byte[argb_size];
if (argb_size > 0)
{
Marshal.Copy(pb_image.plane_[0],pVideoFrame.plane_data_,0, argb_size);
}
{
cur_image_ = pVideoFrame;
}
}
</p>
7.相关事件回调处理
private void PbEventCallBack(IntPtr handle, IntPtr user_data,
UInt32 event_id,
Int64 param1,
Int64 param2,
UInt64 param3,
UInt64 param4,
[MarshalAs(UnmanagedType.LPStr)] String param5,
[MarshalAs(UnmanagedType.LPStr)] String param6,
IntPtr param7)
{
String event_log = "";
switch (event_id)
{
case (uint)NTSmartPublisherDefine.NT_PB_E_EVENT_ID.NT_PB_E_EVENT_ID_CONNECTING:
event_log = "连接中";
if (!String.IsNullOrEmpty(param5))
{
event_log = event_log + " url:" + param5;
}
break;
case (uint)NTSmartPublisherDefine.NT_PB_E_EVENT_ID.NT_PB_E_EVENT_ID_CONNECTION_FAILED:
event_log = "连接失败";
if (!String.IsNullOrEmpty(param5))
{
event_log = event_log + " url:" + param5;
}
break;
case (uint)NTSmartPublisherDefine.NT_PB_E_EVENT_ID.NT_PB_E_EVENT_ID_CONNECTED:
event_log = "已连接";
if (!String.IsNullOrEmpty(param5))
{
event_log = event_log + " url:" + param5;
}
break;
case (uint)NTSmartPublisherDefine.NT_PB_E_EVENT_ID.NT_PB_E_EVENT_ID_DISCONNECTED:
event_log = "断开连接";
if (!String.IsNullOrEmpty(param5))
{
event_log = event_log + " url:" + param5;
}
break;
default:
break;
}
if(OnLogEventMsg != null) OnLogEventMsg.Invoke(event_id, event_log);
}
8.开始推送,停止推送
public bool StartPublisher(String url)
{
if (CheckPublisherHandleAvailable() == false) return false;
if (publisher_handle_ == IntPtr.Zero)
{
return false;
}
if (!String.IsNullOrEmpty(url))
{
NTSmartPublisherSDK.NT_PB_SetURL(publisher_handle_, url, IntPtr.Zero);
}
if (NTBaseCodeDefine.NT_ERC_OK != NTSmartPublisherSDK.NT_PB_StartPublisher(publisher_handle_, IntPtr.Zero))
{
if (0 == publisher_handle_count_)
{
NTSmartPublisherSDK.NT_PB_Close(publisher_handle_);
publisher_handle_ = IntPtr.Zero;
}
is_publishing_ = false;
return false;
}
publisher_handle_count_++;
is_publishing_ = true;
return true;
}
public void StopPublisher()
{
if (is_publishing_ == false) return;
publisher_handle_count_--;
NTSmartPublisherSDK.NT_PB_StopPublisher(publisher_handle_);
if (0 == publisher_handle_count_)
{
NTSmartPublisherSDK.NT_PB_Close(publisher_handle_);
publisher_handle_ = IntPtr.Zero;
}
is_publishing_ = false;
}
9.关闭实例
public void Close()
{
if (0 == publisher_handle_count_)
{
NTSmartPublisherSDK.NT_PB_Close(publisher_handle_);
publisher_handle_ = IntPtr.Zero;
}
}
总结
经测试,在Unity环境下,通过高效数据采集,编码推送,配合SmartPlayer播放,整体延迟可以控制在毫秒级,适合大部分Unity对延迟和稳定性的要求环境恶劣的场景。
解决方案:利用ROS采集VLP-16激光雷达数据
启动VLP-16激光雷达,想用ROS采集雷达数据,按照现有的教程总有一些小问题,现在分享自己成功采集的数据,希望对那些刚进坑的人有所帮助。
我使用 Ubuntu 16.04+ 动力学系统
1. 安装驱动程序
sudo apt-get install ros-kinetic-velodyne
2. 配置网络以连接到激光雷达(无需关闭无线):
修改 IPv4:在有线网络中
更改为手动
IP 地址为 192.168.1.77,
子网掩码为 255.255.255.0,网关为 192.168.1.1。然后连接激光雷达,
打开浏览器输入192.168.1.201,查看激光雷达配置文件。
每次连接雷达时,输入以下两个命令:
sudo ifconfig enp2s0 192.168.1.123
sudo 路由添加 192.168.1.201 enp2s0
3. 创建 ROS 项目:
MKDIR -P catkin_velodyne/SRC
光盘catkin_velodyne/SRC
git 克隆
光盘..
Rosdep install --from-path src --ignore-src --rosdistro kinetic -y
catkin_make
Source devel/setup.bash
4.将Velodyne XML文件转换为ROS节点的YAML文件,VLP-16.xml据说在免费的USB闪存盘中,反正没找到
我从互联网上下载了一个。请记住将下面的地址更改为您的 VLP-16 .xml文件的地址。
rosrun velodyne_pointcloud gen_calibration.py ~/VLP-16.xml (更改为你自己保存的目录)。
5. 加载:
roslaunch velodyne_pointcloud VLP16_points.launch calibration:=~/VLP-16.yaml (更改为你自己保存的目录)。
6、点云图实时展示:
Rosrun Rviz Rviz -F velodyne
然后按主题添加
rviz 添加 PointCloud2,并在主题中输入 /velodyne_points,这样得到的 3D 点云图就可以实时展示。
7. 记录数据:
我看到的教程是用 rosbagrecord-oout/velodyne_points 命令获取 /velodyne_points 主题的数据,但是当我去分析保存的数据时,发现里面的雷达数据被处理了,反正我根本无法解读。我想获取雷达原创UDP报文中的信息来生成距离和强度图像,所以我保存了/velodyne_packets这个主题的数据,保存的数据是收录UDP的正文,每76个UDP数据包(每周扫描360度)都有一个时间戳,然后根据手册就可以从数据中获取距离和强度信息。
罗斯巴格记录 -O 文件名 /velodyne_packets